
Our Guide to Thanksgiving
/
Sides, sides and more sides. Plenty of food. Made from scratch. I’m taking you through my plan for the upcoming holiday ~
Here’s the rundown of this Thanksgiving meal:
Apple Cider Bone Broth
Roasted Shallots tossed in Balsamic Vinegar
Roasted Garlic Purple Mashed Potatoes
Roasted Mushrooms
Thyme-Roasted Carrots
Green Bean Casserole (topped with crispy shallots)
Potato Au Gratin
Skillet Cornbread
Applesauce
Peppercorn-Crusted Tenderloin (topped with crispy shallots)
Pumpkin Pie
I decided to create an “evening before prep” - never a fan of hangry family. 2-3 hours the night before, and then about 5 hours the day of will give you plenty of time to create all these dishes from scratch. If you’re lucky enough to have a sidekick like my girl Kelsey, it makes the time feel special.
All of these dishes were designed to accommodate dietary preferences around gluten and nuts. Now dairy - that’s a whole different story ha :)
My key advice - hydrate, hydrate, hydrate. I do love me some Tom Brady, and his dedication to being the most hydrated man on Earth is my inspo here. The way I decided to implement my cooking prep hydration was through the Fairy Gutmother’s Apple Cider Bone Broth. The aroma from this stovetop drink gives you the apple pie feels. Bone broth is full of electrolytes and gut-building nutrients (collagen and l-glutamine). It’s also comforting. The fresh apple and orange slices really sweeten the broth to a point where you hardly notice it’s bone broth and not apple cider. Plus sipping on some protein is needed when working so hard to feed your loved ones. THEN - after you’ve allowed it to slow cook all evening + Thanksgiving morning, blend up the apple slices for applesauce to serve!
Fairy Gutmother’s Apple Cider Bone Broth
8-12 cups chicken bone broth
8-12 cups filtered water
10-12 Fuji apples, sliced
1 orange, halved
6-8 whole cloves
3-4 cinnamon sticks
¼ tsp nutmeg
¼ tsp all spice
Place apples, orange and spices into bottom of slow cooker or dutch oven. Fill with water and broth. The liquid should equate to about ½ broth and ½ water and should fill to about 1-2 inches from top of slow cooker. Set slow cooker on low for about 10-12 hours. Strain liquid and serve immediately. (Option to blend apples with spices and orange, being careful to remove the cinnamon sticks, with an immersion blender or food processor for a savory apple sauce ~ yum!)
~ recipe adapted from Carley Smith, the Fairy Gutmother


We had such a beautiful crop of shallots at the farm this season, so they deserved a chance to be highlighted. We cooked them two different ways - roasted whole in their skins, and then we crisped some up in the microwave to top our green bean casserole and tenderloins. If you don’t cook with shallots often, below is seriously the easiest and absolutely most delicious way to do so.
Roasted “La Salle” Shallots
Set oven to 300°F. Lay shallots with skins still on across a baking sheet, as many as you desire, where they each have lots of room. Roast them for 2 hours. If you need them to cook faster, simply increase the oven temperature. You’ll know they are done roasting when they are soft to touch when pinched and some of their juices begin leaking out.
It’s easiest to peel the shallots once they’ve cooled. I suggest cooling them in the fridge overnight. Later in the post we come back to these golden pink beauties.


Roasted Garlic Purple Mashed Potatoes - potatoes boiled
My next suggestion to prep the evening before are the purple potatoes for the roasted garlic mash. Thanksgiving requires mashed potatoes in the Strohauer family, so I decided to mix things up this year with purple potato fingerlings in the mash. Approximately 2 lbs of purple fingerling potatoes washed and boiled for 25-45 minutes (sometimes purples take a bit longer than other potato varieties). Once a fork can easily pierce through them, immediately cool them with ice cubes. This cooking-and-immediately-cooling technique is for gut health where some of the potato starch converts into resistant starch - food for your good gut bacteria. Cooked-and-cooled potatoes are one of the highest sources of this type of gut-healthy starch (prebiotic). We’ve written an entire blog post about potatoes for gut health that breaks all of this down if you’re interested in reading more.
Once the potatoes have cooled, about 5 minutes or so, use your fingers to just rub and pull off the skins. Now don’t just throw out those skins. They have beneficial nutrients, especially purples, which are high in antioxidants. Collect those scrapes and throw them into a bag or something for the freezer. Save these food scrapings for when you make homemade bone or veggie broth in the future. It gives incredible flavor, you’re reducing food waste AND you’re getting these incredible nutrients easily added to the broth. Being a farmer is all about being resourceful ;)
Throw those boiled and peeled potatoes in the fridge. Prepped ahead of time. Game changer.
Roasted Garlic Purple Mash - roasted garlic
Mmmm roasted garlic. Crowd pleaser in-and-of-itself. Depending on the oven use for the shallots and pie crust coming up, this is a great thing to prep the evening before if you can.
1 head garlic
¾ cup high heat oil (we used our favorite Colorado Mills Sunflower oil)
10 sprigs fresh thyme
Preheat oven to 400°F. Rub off excess papery skin from garlic head without separating the cloves. Slice the tip off the head, exposing the cloves. Place the garlic in a small baking dish, such as a bread pan. Drizzle with oil and lay thyme sprigs around it. Cover with foil. Roast until very soft, 30 to 45 minutes. Store in the fridge overnight with the oil from the pan. We will use that in the mashed potatoes tomorrow.


Now, making the perfect pumpkin pie is a true feat. Flaky, delicious crust with a pumpkin filling that sets. We trusted our go-to cooking source - America’s Test Kitchen. I’m obsessed with their gluten-free versions of recipes because they always taste like the real deal. Baking is not my specialty, but this pie came together easily and was true perfection.
To create the crust, we used America’s Test Kitchen (ATK) recipe for the GF flour blend. What’s great about this step is all the flour leftovers here. It’s plenty to make multiple pies in the future - or my favorite - their GF Chocolate Chip Cookies. They seriously melt in your mouth.
America’s Test Kitchen GF Flour Blend
Makes 42 oz (about 9 ⅓ cups)
24 oz white rice flour (4 ½ cups plus ⅓ cup)
7 ½ oz brown rice flour (1 ⅔ cups)
7 oz potato starch (1 ⅓ cups)
3 oz tapioca starch (¾ cups)
¾ oz (3 tbs) nonfat milk powder
Whisk all ingredients together in a large bowl until well combined. Transfer to an airtight container and refrigerate up to 3 months. (*when using this flour blend, it’s always best to let it sit at room temperature for at least 30 minutes before using in a recipe)
~ recipe adapted from America’s Test Kitchen’s The How Can It Be Gluten Free cookbook


I can’t get enough of Chrissy Teigen. She just gets food. Good food. I’m using a couple of her recipes, including my go-to, never fails, everyone is always obsessed - her roasted mushrooms. I make them literally for everything. They are just that good. Kelsey and I decided to prep these the night prior too because trimming and cleaning them up takes approximately 15-20 minutes. Also, I doubled her recipe here because I’ve found this to be the perfect serving amount for events.
Chrissy Teigen’s Roasted Mushrooms - mushrooms prepped
2 lbs white mushrooms, trimmed and cleaned
2 lbs cremini mushrooms, trimmed and cleaned
To trim and clean these guys, I quickly rinse down all the mushrooms first. Then I quickly rinse each one individually, clean off the skin and any dirt with a paper towel, and then pull out the entire stem. No one enjoys eating stems. This step is crucial in my opinion. That’s it for prep here. Store them in the fridge overnight.


Now the pie crust can take you some time because it’s in-and-out of the fridge twice, with the dough needing to warm up to room temperature as well. My advice would be to prep this the evening prior if possible. It just helps keep things relaxed the day of Thanksgiving, and the pie is better served at room temperature. It’s the only dish where timing of preparation isn’t essential, so why not prep it ahead of time. (*Before you start here, throw slices of butter into the freezer for 10-15 minutes.)
*pro tip ~ butter in the freezer prior to making a flaky crust or baked good is essential. You can either chop it up into pieces or grate it for finer pieces of butter that melt all over into pockets of the dough
America’s Test Kitchen GF Pumpkin Pie - prep the crust
Single Crust Pie Dough
Makes enough for 1 x 9-inch pie
3 tbs ice water
1 ½ tbs sour cream
1 ½ tsp rice vinegar
6 ½ oz ATK GF Flour blend
1 ½ tsp sugar
½ tsp salt
¼ tsp xanthan gum
8 tbs unsalted butter, cut into ¼-inch pieces and frozen for 10-15 minutes
Combine ice water, sour cream and vinegar together in a bowl. Process flour blend, sugar, salt and xanthan gum together in food processor until combined, about 5 seconds. Scatter butter over top and pulse until crumbs look uniform and distinct pieces of butter are no longer visible, 20-30 pulses.
Pour sour cream mixture over flour mixture and pulse until dough comes together in large pieces around blade, about 20 pulses.
Turn dough onto sheet of plastic wrap and flatten into 5-inch disk. Wrap tightly in plastic and refrigerate for 1 hour. Before rolling out dough, let it sit on counter to soften slightly, about 30 minutes. We ended up needing about an hour for the dough to warm up enough for us to smoothly spread it out. It just depends on how long you placed it in the fridge. (Dough can be wrapped tightly in plastic and refrigerated for up to 2 days.)
After rolling dough between two sheets of plastic, remove top sheet of plastic from dough and gently invert dough over 9-inch pie plate. Working around circumference, ease dough into plate by gently lifting plastic wrap with one hand while pressing dough into plate bottom with other hand. Let excess dough hang over rim. Remove plastic wrap. Trim excess dough with plastic shears, leaving ½-inch overhang beyond lip of plate. Tuck overhang underneath itself to form a tidy, even edge that sits on the lip of the pie plate. Using index finger of one hand and thumb and index finger of other hand, create fluted ridges perpendicular to edge of pie plate (or a fork like we did!). Wrap dough-lined pie plate loosely in plastic and place in freezer until fully chilled and firm, at least 15 minutes or up to an hour.
~ recipe adapted from America’s Test Kitchen’s The How Can It Be Gluten Free cookbook


A final note on the evening prep here ~ you have options to prep the other cremini mushrooms for the green bean casserole by cleaning and slicing, rinsing and trimming the green beans, cutting the potato slices, creating the beef demi-glaze, as well as prepping a breakfast / egg casserole for an easy yet delicious morning breakfast for everyone while you’re cooking :)
Thanksgiving Morning
My favorite way to start a morning - coffee. Always. Even better way to start the morning - Bulletproof Coffee. Between the coffee and the apple cider bone broth now ready, there’s plenty to sip on to stay fueled, hydrated and sharp. Plus your place will smell amazing from the overnight bone broth.
Bulletproof Coffee
Serves: 2 full mugs
12-16 oz french pressed coffee (we used our local favorite Allegro, 2-3 tbs freshly ground coffee beans)
1-2 tbs unsalted butter
1-2 tbs Brain Octane Oil (my fav - but you can also use MCT oil or coconut oil)
optional: cinnamon or pumpkin spice!
2-3 tbs of freshly ground coffee french pressed style. Then blend everything up for 10 seconds. Drink up ~


First dish to start tackling the day of are those roasted “La Salle” shallots (I keep referring to them as “La Salle” because that’s where I grew up, the town we still grow them in, and I love how it all sounds together). Pull these out of the fridge and let’s start peeling. You want to be gentle, but the skins should come right off. You’ll have this juicy white shallot waiting for you. In some of these shallots, you may even have up to 3 bulbs. Keep going until you’ve unpeeled all of the bulbs - but save the skins for bone or veggie broth! Just like we did on the purple potato skins. Resourceful :) Plus those skins have that delicious roasted juice from the bulbs, so they will truly give so much flavor to your future broth.
Roasted Shallots - balsamic + fresh parsley
Take your shallot bulbs and toss them in a little balsamic vinegar. Top them off with fresh parsley. This is one of those unexpected side dishes that truly elevates the meal. Fancy like the French … or the La Salle Shallot farmer over here.
If you love this side dish or you just want to know more about shallots ~ check out our ultimate guide for the 101 on shallots. Storing, slicing, cooking. We’ve got it all.


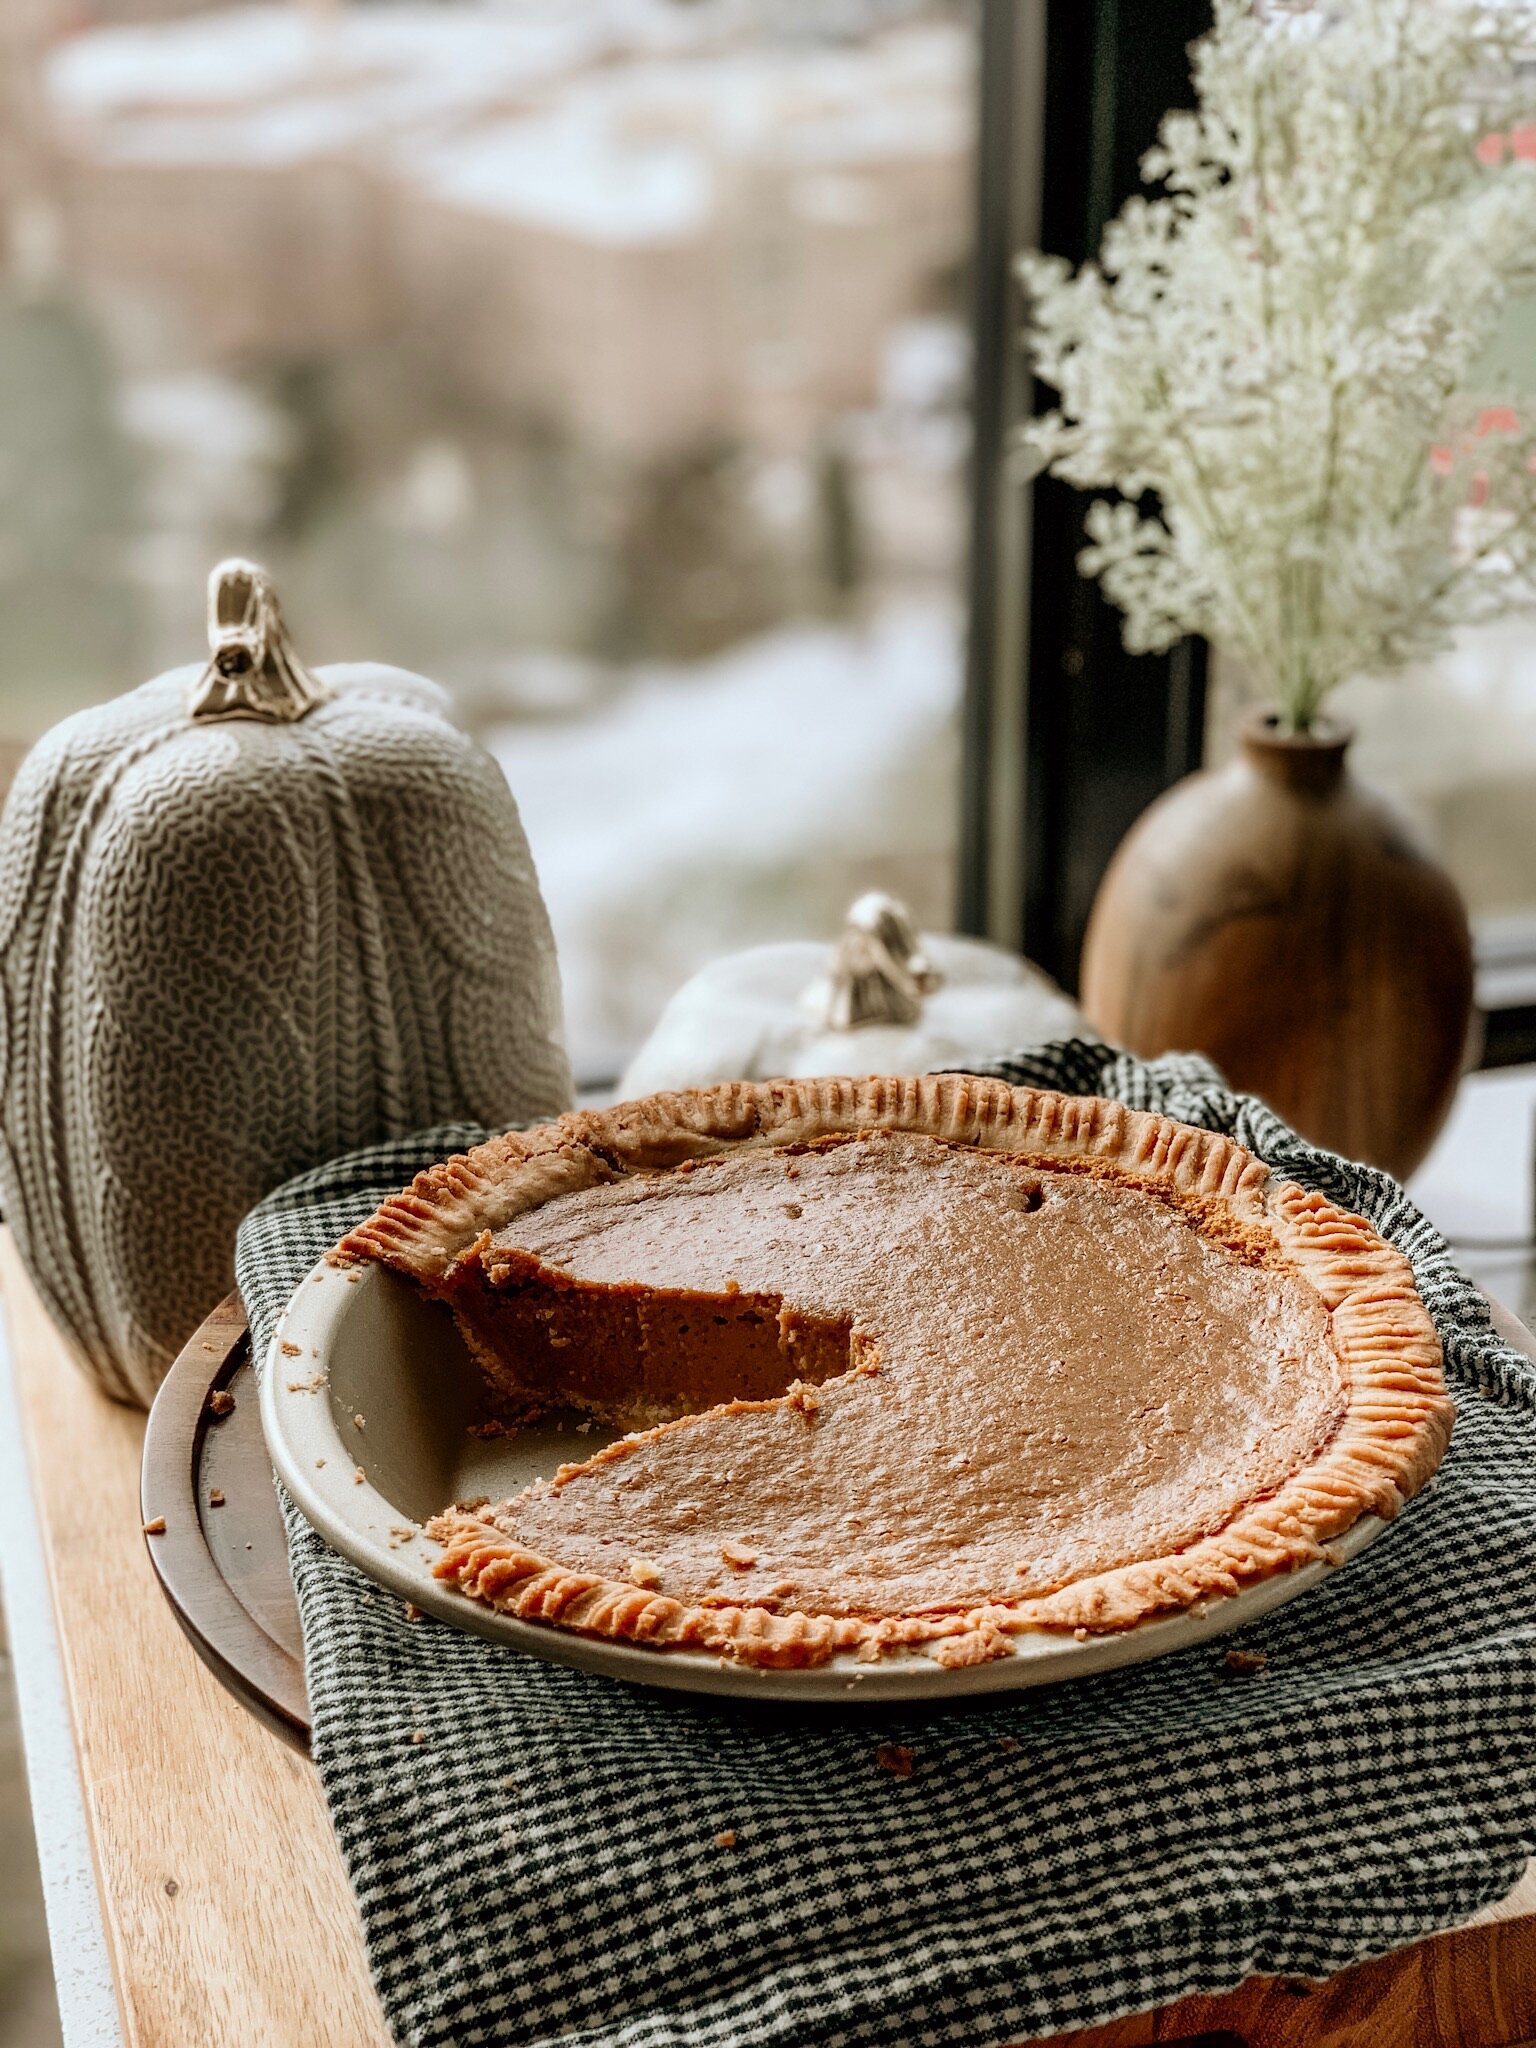
The best part has finally arrived ~ baking the pumpkin pie.
America’s Test Kitchen’s Gluten Free Pumpkin Pie
Serves 8
Single-Crust Pie Dough
1 can (15 oz) pumpkin puree
7 oz (1 cup packed) dark brown sugar
2 tsp ground ginger
2 tsp ground cinnamon
1 tsp ground nutmeg
½ tsp salt
¼ tsp ground cloves
⅔ cup heavy cream
⅔ cup whole milk
4 large eggs
Adjust oven rack to middle position and heat oven to 375°F.
Remove plastic and bake until crust is light brown in color, 20 to 25 minutes, rotating pie plate halfway through baking. Transfer pie plate to wire rack. (Crust must still be warm when filling is added.) Adjust oven rack to lower position and increase oven temp to 425°F.
While crust bakes, process pumpkin puree, sugar, ginger, cinnamon, nutmeg, salt and cloves together in food processor until combined, about 1 minute. Transfer pumpkin mixture to medium saucepan (do not clean processor bowl) and bring to simmer over medium-high heat. Cook pumpkin mixture, stirring constantly, until thick and shiny, about 5 minutes. Whisk in cream and milk, return to simmer briefly, then remove from heat.
Process eggs in food processor until uniform, about 5 seconds. With machine running, slowly add about ½ of hot pumpkin mixture through feed tube. Stop machine, add remaining pumpkin, and continue processing mixture until uniform, about 30 seconds longer.
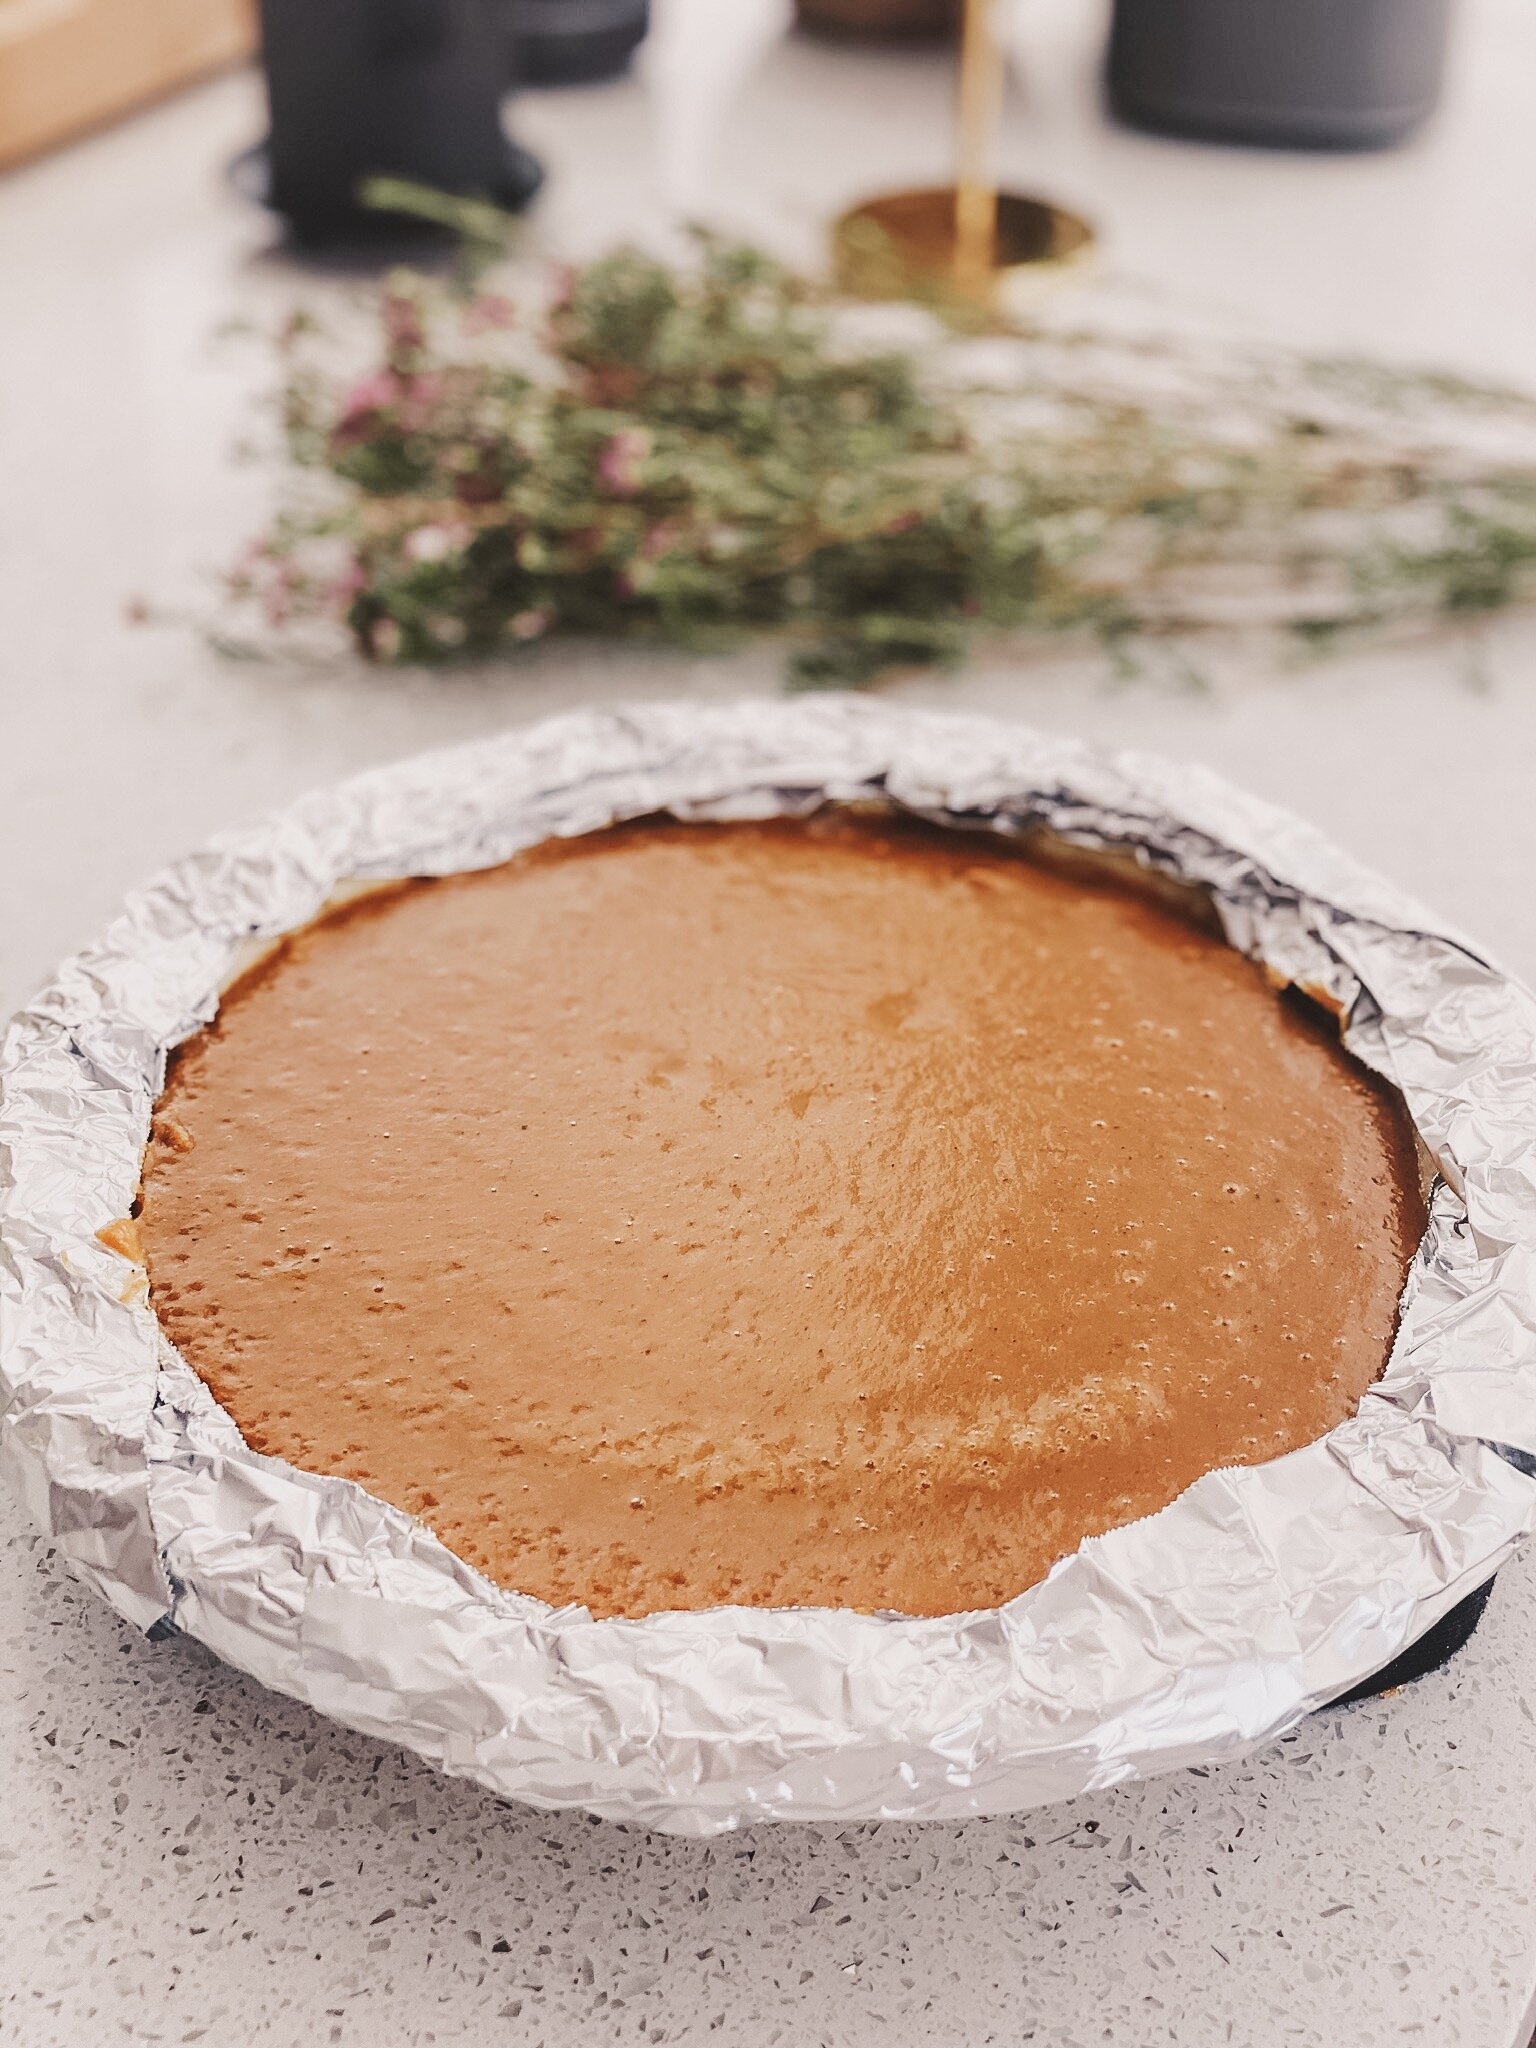
Immediately pour warm filling into warm, partially baked pie crust. (If you have extra filling, ladle it into pie after 5 minutes of baking, by which fime filling will have settled.) Bake until filling is puffed and lightly cracked around edges and center wiggles slightly when jiggled, about 25 mintues. Let pie cool on wire rack until filling has set, about 2 hours; serve slightly warm or at room temp. (*We wrapped foil around the pie crust before baking the pie and pie filling together to keep the crust from burning slightly around the edges. See the image below.)
~ recipe adapted from America’s Test Kitchen’s The How Can It Be Gluten Free cookbook


Now it’s time for my cooking specialty - potatoes. Here at the farm, there’s only one potato we don’t grow: sweet potatoes. It’s not a Colorado thing, and sweet potatoes growers are sweet potatoes growers. Weird, but it’s just not the same ha. Anyways, I wanted to still include sweet potatoes for Thanksgiving traditions, and of course my girl Chrissy Teigen saved the day. I love her two-tone au gratin concept, and it looks beautiful on the table as well. Elevate your potato game with this dish.
*quick note ~ potatoes are an indigenous food to the Americas, originally from Peru. A Thanksgiving meal wouldn’t be complete without potatoes. Most of the purple fingerling potatoes we grow are called Purple Peruvians - giving credit to where they originated.
Chrissy Teigen’s Two-Tone Potato Gratin
Serve 10 - 12; Active Time: 30 min; Total Time 1 hour 30 min
2 ¾ cups heavy cream
3 cloves garlic, finely minced
1 tbs chopped fresh thyme, plus extra for garnish
1 tbs chopped fresh sage
1 tsp chopped fresh rosemary
2 tsp kosher salt
1 tsp freshly ground pepper
¼ tsp grated nutmeg
Dash of cayenne pepper
2 cups shredded Gruyere cheese
2 cups finely grated Parmigiano-Reggiano cheese (grate yourself; you’ll thank us later for the extra tastebud love here)
2 lbs sweet potatoes
1 ⅔ lbs russet potatoes
Preheat the oven to 425°F. In a large bowl, whisk together the cream, garlic, thyme, sage, rosemary, salt, black pepper, nutmeg and cayenne. In a separate bowl, toss together the Gruyere and Parm.
Peel the potatoes, then with a handheld mandoline or a sharp knife, slice the potatoes crosswise into ⅛-inch-thick rounds. Pour ½ cup of the cream mixture into 9 x 13’inch baking dish, then make a layer of potatoes in as nice a pattern as you can, overlapping the slices slightly. (You can do this in individual layers of sweet potatoes and russet potatoes, or mix them up, or do all the sweet and then all the regular … basically you do you!) Drizzle ¾ cup of the cream mixture on top and sprinkle with 1 cup of cheese mixture. Repeat this layering two more times. Finish with a top layer of potatoes and sprinkle the remaining cheese on top of that. Garnish with fresh thyme.
Cover with foil and bake until bubbling, about 30 minutes. Remove the foil, reduce the oven temp to 400°F, and bake until the top is golden and bubbling, another 30 minutes. Turn the oven to broil and broil until the top is browned, 1-2 minutes.
~ recipe adapted from Chrissy Teigen’s Cravings For More cookbook


Chrissy Teigen love continues by finally roasting our mushrooms. This recipes is seriously so simple. Enjoy! :)
Quick tip ~ always allow your garlic to sit for at least 10 minutes after chopping before cooking. When you chop or crush garlic, it activates its sulfur compounds (specifically alliinase) that have antioxidants, as well as anti-inflammatory properties. It also delivers a richer taste. Basically, allowing the garlic to sit before cooking triggers an enzyme reaction that increases the health aspects of the garlic. Also fun tip, to avoid garlic breath, include fennel seeds in your recipes with garlic to neutralize any odors. Or sub in shallots ~ they have no onion breath odor and have a little garlic kick to them that’s sweeter.
Chrissy Teigen’s Roasted Mushrooms
Serves: 4-6; Prep Time: 10 Minutes; Total Time: 45 Minutes
1 stick (8 oz) unsalted butter, melted
1/2 cup extra-virgin olive oil (I always top off with an olive oil infused with truffle; see below)
4 tbs minced garlic (about 6 cloves)
4 tbs chopped fresh thyme
4 tsp kosher salt
2 tsp freshly ground black pepper
2 lbs white mushrooms, trimmed and cleaned
2 lbs cremini mushrooms, trimmed and cleaned
Preheat oven to 425°F. In a large bowl, combine the melted butter, oil, garlic, thyme, salt and pepper. Add the white and cremini mushrooms and toss to coat. Pour the mushrooms onto a large rimmed baking sheet and roast, shaking occasionally, until shriveled but still really juicy, 30 to 45 minutes.
~ recipe adapted from Chrissy Teigen’s Cravings cookbook


Nespresso Break
At this point, Kelsey and I greatly needed one :)

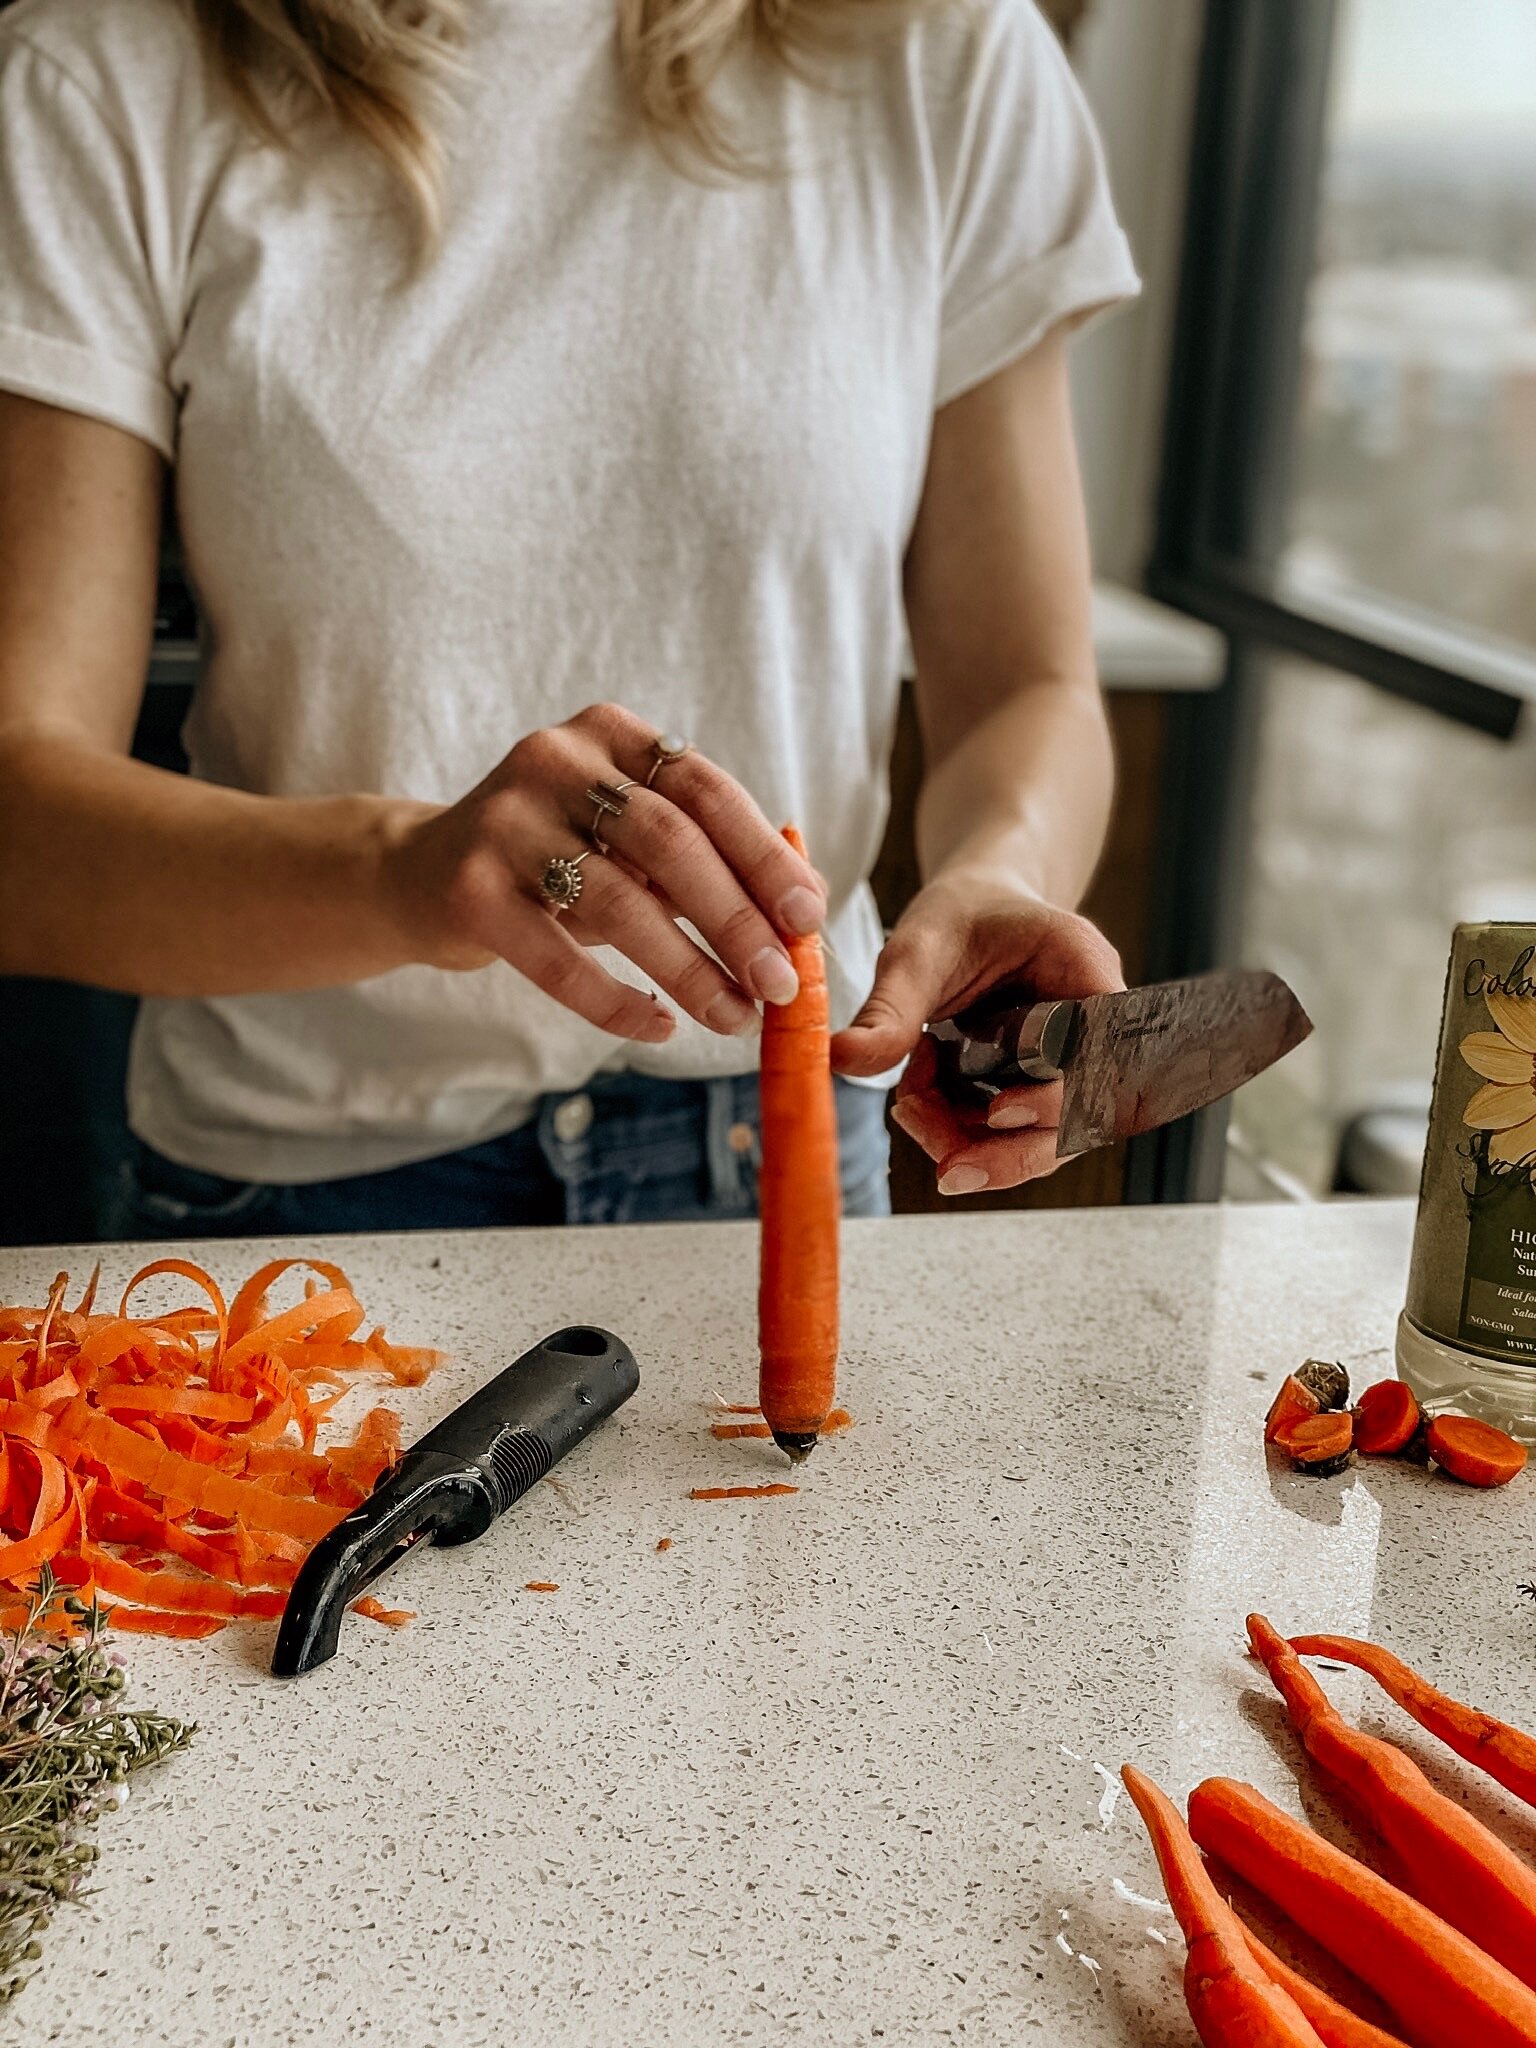
Eating local couldn’t be easier for those in Denver. Northern Colorado has SO much colorful produce. One of my favorite farming operations is only 10 minutes from us ~ Hungenberg Produce. I used their organic carrots in Chrissy’s Thyme-Roasted Carrot recipe, including our favorite high-heat oil: Colorado Mills Sunflower Oil.
Chrissy Teigen’s Thyme-Roasted Carrots
1 ½ lbs medium carrots
3 tbs high-heat oil
1 tsp kosher salt
¼ tsp freshly ground black pepper
6 thyme sprigs
Preheat the oven to 400°F. Line a large rimmed baking sheet with foil. Peel the carrots. If they have tops, trim them, leaving 1 inch of the greens on. Slice any fatter carrots (thicker than 1 inch) in half lengthwise. Leave the smaller ones whole.
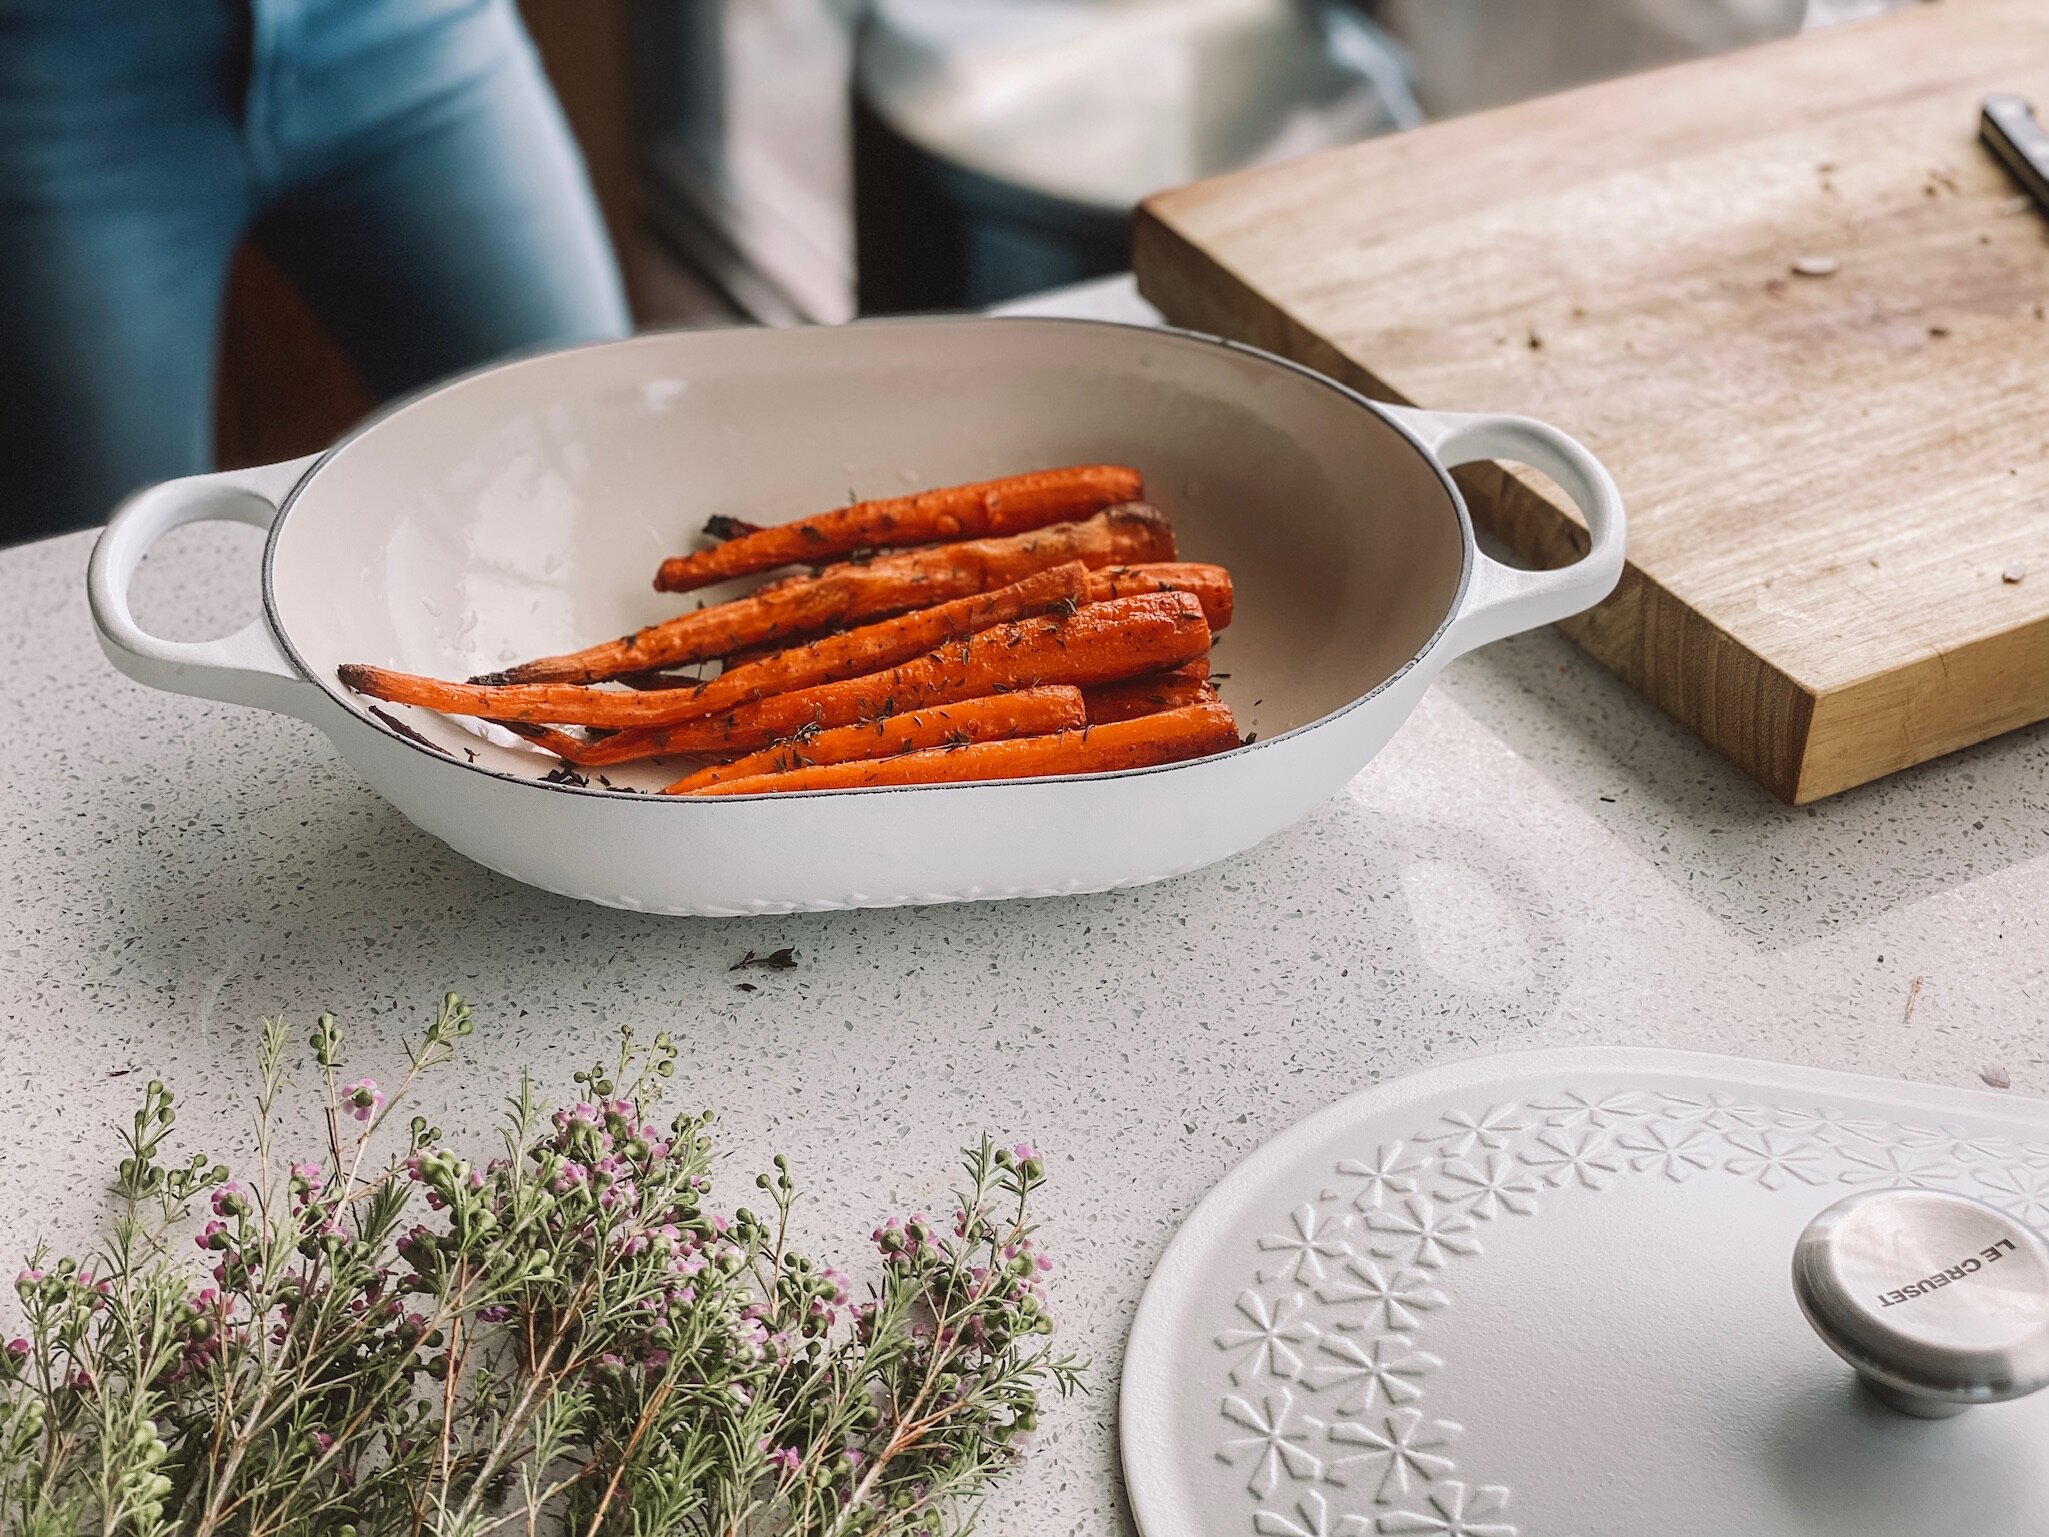
Arrange the carrots on the baking sheet. Drizzle with the oil and sprinkle with salt and pepper. Jiggle the pan so the oil, salt, and pepper coat the carrots on all sides. Scatter the thyme sprigs among the carrots and roast until the undersides are golden and carmelized, 30 to 40 minutes. If they can’t be easily pierced with a fork yet, shake the carrots and continue to roast 5 to 10 minutes longer.
We saved the carrot shavings here again to add later to our future bone or veggie broth :)
~ recipe adapted from Chrissy Teigen’s Cravings cookbook


Crispy shallots - the easy way. We’ve got more ways to prepare crispy fried shallots on our ultimate guide to shallots, but this recipe from Chrissy saved us A LOT of time. We are making these crispy shallots to top the green bean casserole, as well as to top the peppercorn crusted tenderloin.
Chrissy Teigen’s Crispy Shallots
Makes about 2 cups; Active Time: 7 min; Total Time: 15 min
2 cups thinly sliced shallots
2 cup high heat oil
Kosher salt
Check out our 101 guide to shallots for more tips, but the best way to cut shallots are to initially use a paring knife to slice a long cut down the middle of the skin. Gently peel off the outer skin layer. You want to be gentle with shallots. For slicing or chopping, it’s SO much easier if you have a chef knife to use here. Whether slicing or chopping, you want to cut down in line on the veins of the shallots.
Once sliced, scatter the shallots evenly in an 8 x 8-inch glass dish. Pour the oil over the shallots and microwave on high until the shallots are browned and crisp, 10-15 minutes. (Begin checking them at 8 minutes as they can darken quickly.) Quickly and carefully drain the shallots in a fine-mesh sieve set over a bowl to catch the oil. Transfer the shallots to paper towels and season with salt. Let cool completely. The shallots will keep in an airtight container for a week. Store the oil in an airtight container in the fridge for up to 1 month.
~ recipe adapted from Chrissy Teigen’s Cravings For More cookbook


Williams Sonoma’s Ultimate Green Bean Casserole
Serves: 8; Prep Time: 15 minutes; Cook Time: 70 minutes
1 1/2 cup crispy shallots
1 tbs high heat oil (we used our favorite Colorado Mills Sunflower oil)
2 tbs unsalted butter
1 lbs cremini mushrooms, sliced
¼ cup finely chopped shallots
¼ cup Bob’s Red Mill All-Purpose Gluten-Free Flour
1 cup chicken stock
1 cup heavy cream
2 lbs green beans, trimmed and blanched
Kosher salt and freshly ground black pepper
Preheat an oven to 375°F.
Shallot chopping tip ~ after peeling the skins off, chop off the end, but leave the stem / root intact. While holding onto that, cut down all the way into the shallot along its veins all the way across - without detaching from the stem. Now slice horizontally - the opposite direction - from the underside 2-3 times up the shallot. Finally slice down from the top of the shallot to have finely chopped shallots.
In a large ovenproof sauté pan over medium-high heat (we are obsessed with Williams Sonoma’s new copper line used below), warm the oil and melt the butter. Add the mushrooms and cook, stirring occasionally, until well browned, 6 to 8 minutes. Reduce the heat to medium, add the chopped shallots and cook, stirring occasionally, until softened, 2 to 3 minutes. Add the flour and cook, stirring constantly, until fragrant, about 1 minute. While stirring constantly, slowly add the stock and then the cream. Bring to a simmer and cook, stirring occasionally, until thickened, 3 to 4 minutes. Add the green beans and season with salt and black pepper. Sprinkle the fried shallot rings on top.
Transfer to the oven and bake until the edges are bubbling and the top is browned, about 30 minutes. Let rest for 5 to 10 minutes before serving. Serves 8.
~ recipe adapted from Williams Sonoma


Elevating the potato game again here with our PURPLE mashed potatoes. Gorgeous color for the table, high in antioxidants and kids love how “weird” it is. We like weird here at the Strohauer family.
Roasted Garlic Purple Mashed Potatoes
1 head garlic
¾ cup extra-virgin olive oil
10 sprigs fresh thyme
2 lbs purple potatoes, mashed (we used our Magic Molly purple fingerling potatoes here .. yes, you read that right. Our farm sells “Magic Molly” …. in Colorado … no, we did not name this potato variety)
½ cup sour cream
½ cup milk
½ tsp salt
¼ tsp freshly ground pepper
Squeeze the garlic cloves out of their skins into the bowl with the potatoes (you might want to warm up both in the microwave first). Strain the oil through a fine sieve over the potatoes, pressing on the solids (discard the thyme). Add sour cream, milk, salt and pepper; mash to desired consistency.
~ recipe adapted from Eating Well

Simple yet delicious is this next recipe. It took hardly any time at all and turned out perfectly.
Williams Sonoma’s GF Skillet Corn Bread with Thyme
Serves: 8 - 10
2 cups (14 oz) GF coarse-grind cornmeal
2 tbs sugar
1 ½ tsp kosher salt
½ tsp baking powder
½ tsp baking soda
1 egg
1 ½ cups buttermilk
4 tbs (½ stick) unsalted butter, melted, plus 6 tbs unsalted butter, at room temp
1 tbs chopped fresh thyme
Flaky sea salt
Place a 10” cast-iron fry pan in an oven and preheat over to 450°F. In a large bowl, whisk together the cornmeal, sugar, kosher salt, baking powder and baking soda. In a medium bowl, whisk together the egg and buttermilk. Add the egg mixture to the cornmeal mixture and stir until combined. Stir in the 4 tbs melted butter.
Carefully remove the pan from the oven and add 1 tbs of the room temp butter, swirling the pan until the butter is melted and coats the pan. Scrape the batter into the pan and spread evenly. The batter should immediately begin to sizzle around the edges. Bake until the cornbread is golden brown and the center is firm, about 12 minutes. Transfer the pan to a wire rack and let cool for 15 minutes. Spread the remaining 5 tbs. Butter over the cornbread. Sprinkle with thyme and sea salt.
~ recipe from Williams Sonoma


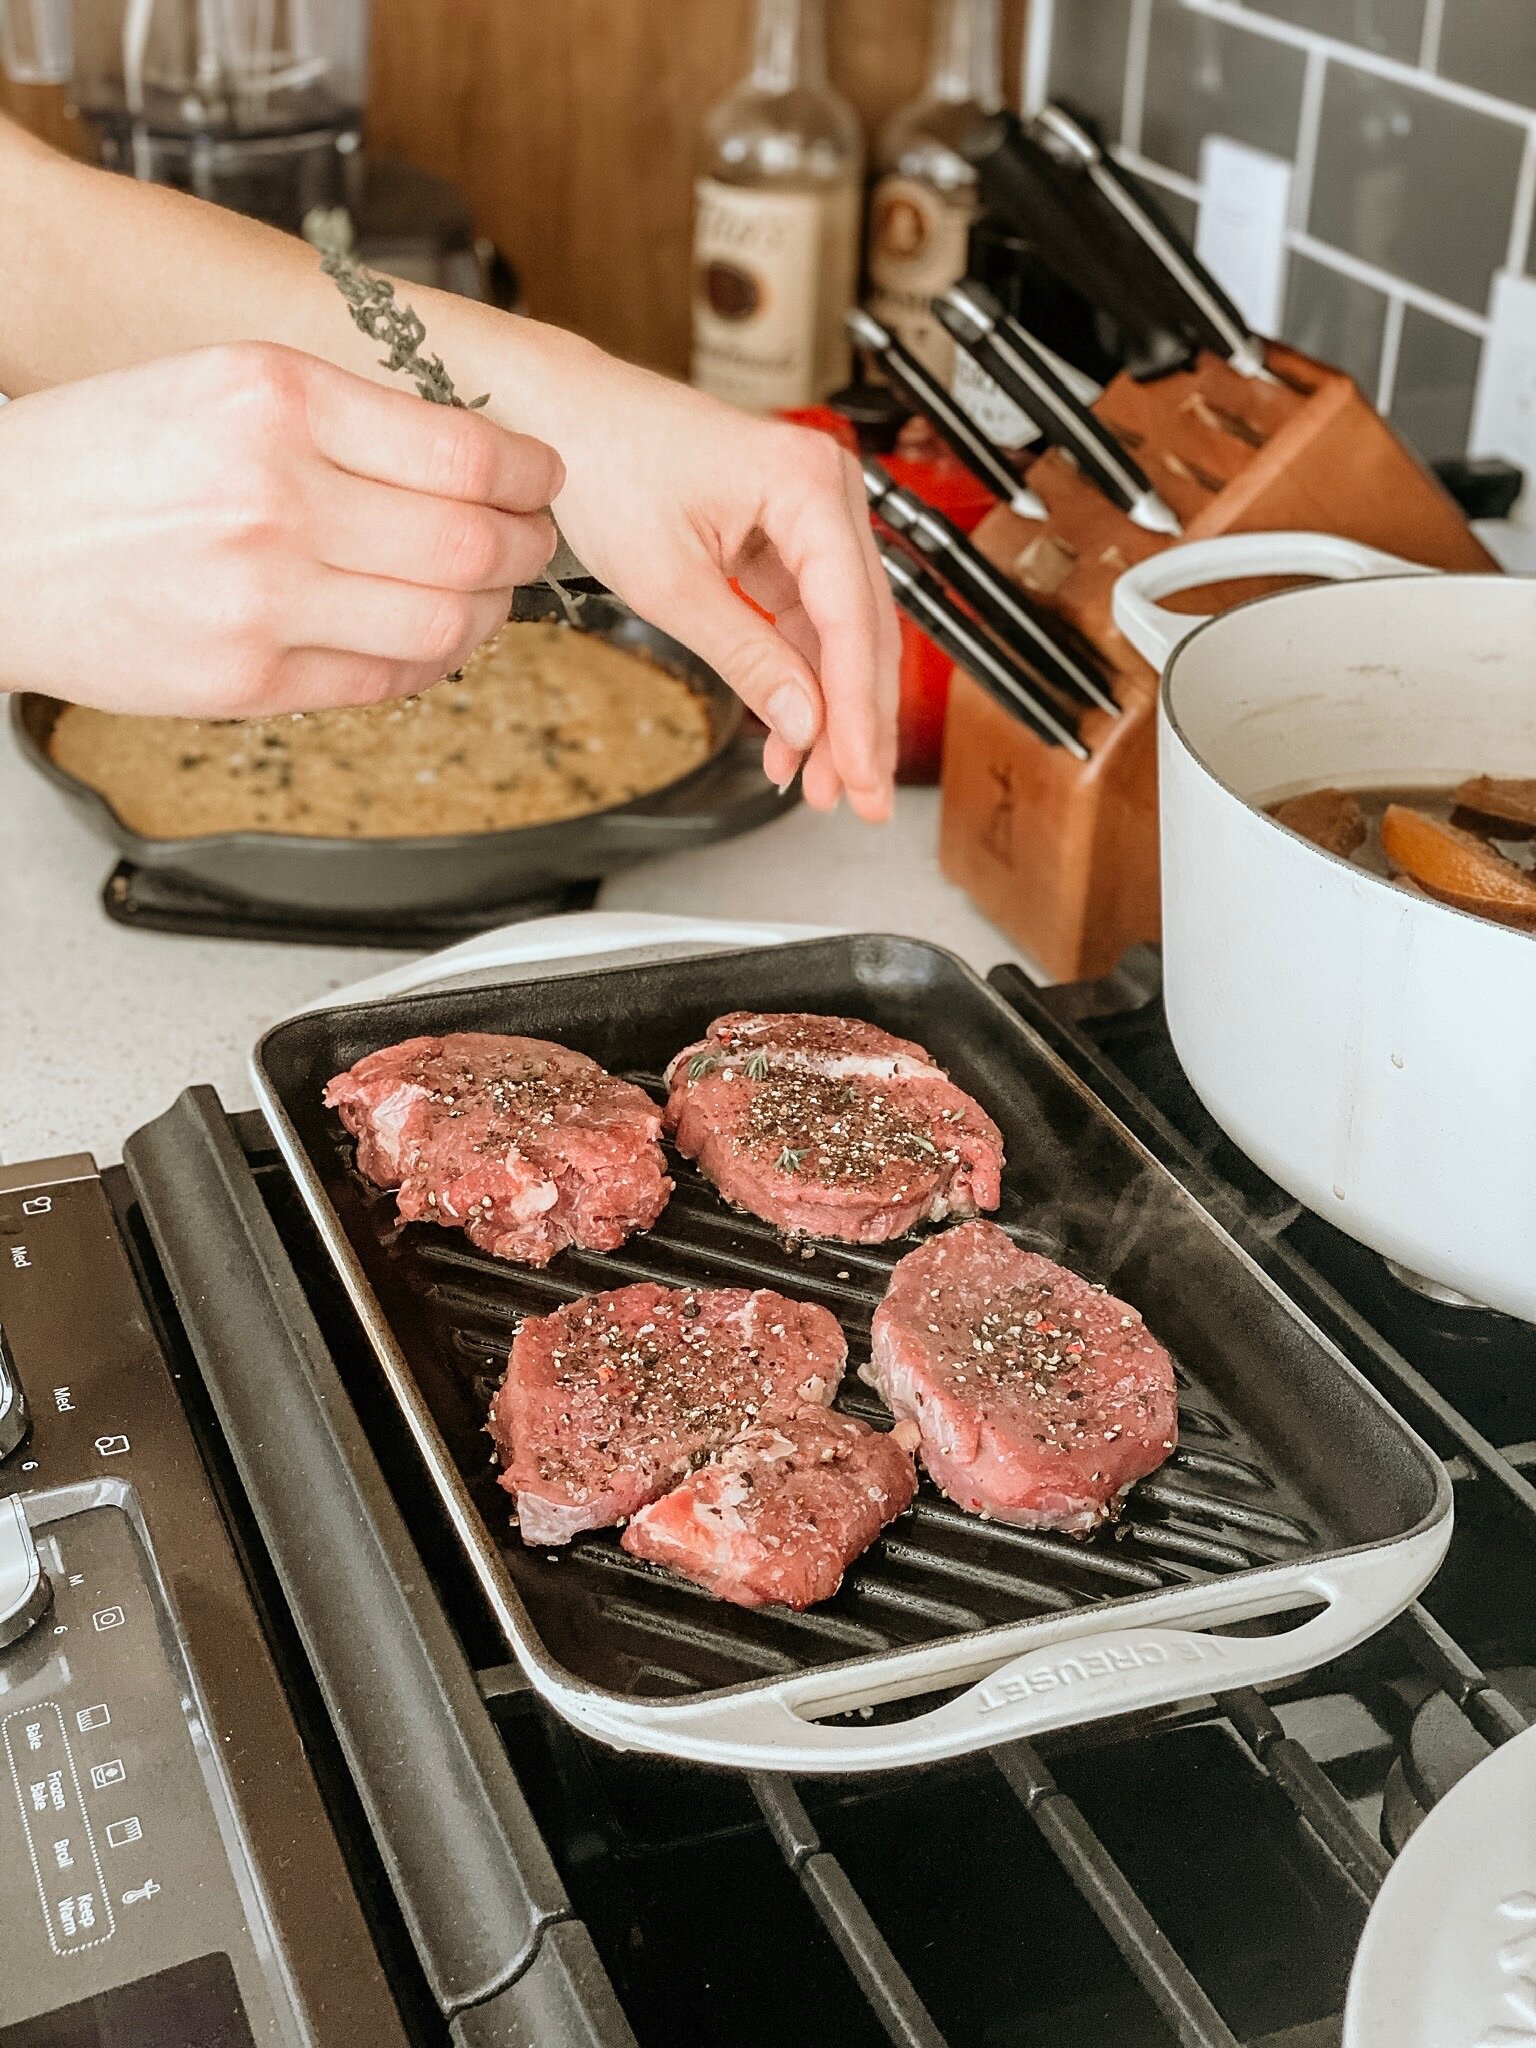
We have arrived ~ the final preparation. I always save the best for last, and steak is one of my top three food loves - along with coffee and butter :) Potatoes come in at 4th ha! Can’t help it. Now my family doesn’t really have anyone who looks forward to turkey, so I figured it was time for a change. HelloFresh had this recipe I had to try, and I elevated it a bit with these gorgeous tricolored exotic peppercorns. We also topped the tenderloin at the end with our crispy shallots. Couple quick thoughts ~ you can prep the beef demi-glaze ahead of time or before you begin this recipe to have on-hand. Also, the recipe calls for allowing the tenderloin to sit in the fridge after being crusted for an hour, but we skipped that step because those peppercorns will sear into the meat perfectly - and we cooked the tenderloin right before everyone was about to sit down. Having this fresh out of the oven was the most important to us. Plan on 20-25 minutes of cooking time here.
HelloFresh’s Peppercorn-Crusted Beef Tenderloin
Beef demi-glaze (beef bone broth, unsalted butter, arrowroot starch)
1 tbs tricolored peppercorns
1 yellow onion
5 tsp sherry vinegar
6 x 5oz beef tenderloin
1 tsp thyme
3 tbs butter
Salt
1 tbs high heat oil
Pepper
We want to start with making the beef demi-glaze. Most store-bought have gluten, and honestly, it’s so easy to make your own. To create the equivalent of 1 cup of demi-glaze, simmer 2 cups beef broth and 1 tsp. of butter in a pan until the broth is reduced by half. Dissolve 1 tsp. of arrowroot or cornstarch in cold water and add to the beef broth, stirring constantly. Continue to simmer until the mixture is thickened.
Place peppercorns in a zip-close bag; crush using a rolling pan or heavy-bottomed pan until finely ground. Pat beef dry with paper towels and season all over with plenty of salt and as many crushed peppercorns as you like. Cover and refrigerate at least 1 hour before cooking (we skipped this step).
Meanwhile, preheat oven to 425°F. Wash and dry all produce. Halve, peel and finely chop onion until you have 1 cup. Strip thyme leaves from stems; discard empty stems and roughly chop leaves until you have 1 tsp (save remaining thyme springs for garnish).
Heat a large drizzle of oil in a large pan over medium-high heat. Working in batches, add beef to pan and cook until browned, 2-4 minutes per side (it’ll finish cooking in step 6). Transfer to a baking sheet and set aside. Remove pan from heat to cool for 1-2 minutes. Wipe out pan.
Heat a drizzle of oil in same pan over medium heat. Add onion and season with salt and pepper. Cook, stirring, until softened, 5-6 minutes. Add chopped thyme and cook until fragrant, 30 seconds. Add vinegar and cook, stirring, until liquid evaporates, 1-2 minutes.
Add demi-glace and ½ cup water to pan. Simmer, stirring, until thickened, 3-5 minutes. Remove pan from heat. Stir 3 tbs butter into sauce until melted.
Transfer baking sheet with beef to oven. Roast to desired doneness, 5-10 minutes. If necessary, reheat sauce. Once beef is done, transfer to a serving platter. Drizzle with half the sauce and garnish with remaining thyme sprigs. We also chose to top ours with crispy shallots. Serve with remaining sauce on side.
~ recipe adapted from HelloFresh


Happy Thanksgiving! We are so grateful for you, our team and our loved ones - and a great harvest this year.


We broke bread, gave thanks to God and dug in with my friends for the official taste-testing at this point. Kelsey’s husband was our unbiased test taster, and he couldn’t have made a better comment to a non-sweet potato-farmer :)
“The only thing that would make this Au Gratin better would be to have no sweet potatoes.”
xo,
Amber